

 Edit This Page
There is no sign-up in Repsy Open Source: you use the repositories of your own instance. A private repository needs a login to be read or written, and a public repository can be read without one. This page shows how to find or create a PyPI repository and where to get the credentials that twine and pip need.
The Default Repository
When the first user of an instance is created, Repsy creates a private PyPI repository named pypi (and one private repository of every other type). If you only need one PyPI repository, you can use it right away.
Create a repository
You need the ADMIN role to create repositories. Other users can use every repository, but they cannot create, rename, change or delete one.
- Sign in to the web UI of your instance and go to the Repositories tab.
- Click Create Repository.
- Select the type PyPI.
- Enter a Name. It can have up to 25 characters: letters, digits,
_and-, and it cannot start with-. Some names are reserved for the web UI and are refused. - Leave the visibility on Private, or switch it to Public if anyone should be able to install from the repository without credentials. You can change it later in the repository settings. Uploading always needs credentials, also in a public repository.
- Optionally add a description and click Create.
Find the repository URLs
A PyPI repository has two addresses, both made of the repository address of your instance and the repository name:
| Use | Address |
|---|---|
Upload (twine) | https://<your-repsy-host>/<repo-name> |
Install (pip), as the index URL | https://<your-repsy-host>/<repo-name>/simple |
https://<your-repsy-host> stands for the address of the package protocol port of your instance, for example http://localhost:9090 for a local start, see Ports and Repository URLs.
Open the repository in the web UI and click Configure to see a .pypirc snippet that already contains the upload URL and the name of the repository.
Get your credentials
twine and pip authenticate with HTTP Basic credentials, and there are two choices:
- A user account. Use the username and the password you sign in to the web UI with.
- A deploy token. Open Settings of the repository (the more options menu (⋮) of the repository in the Repositories tab), go to Deploy Tokens, click Create Token, fill in the form and copy the token when Repsy shows it. It is shown only once. A token belongs to one repository and can be Read/Write or Read Only. Put the token where the client asks for the password. Repsy checks only the token, so the username can be any non-empty value.
Use a deploy token in CI jobs and whenever you give somebody access to one repository only. A Read Only token is enough to install, and publishing needs Read/Write. You need the ADMIN role to create deploy tokens. See Creating a Deploy Token.
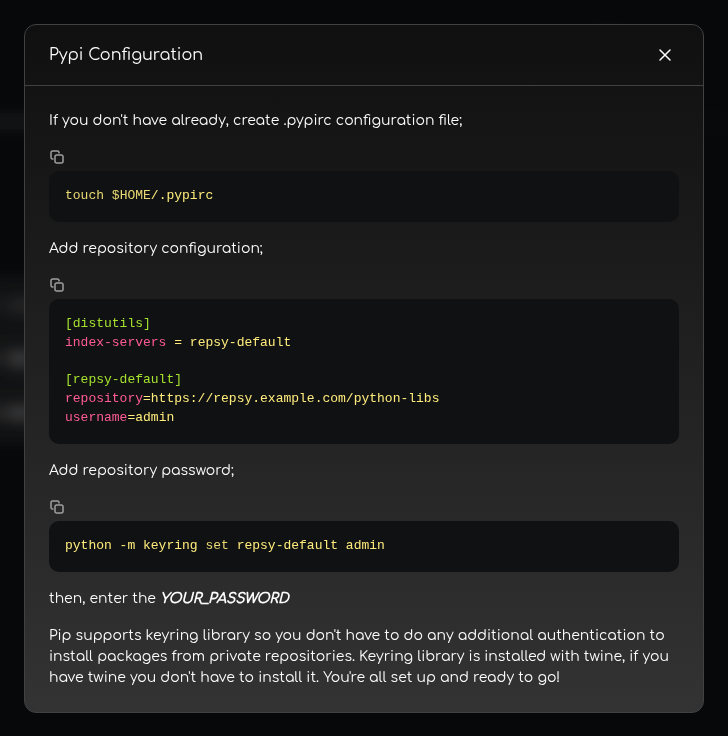
.pypirc snippet. Your instance shows its own address instead of the demo address repsy.example.com.You can now publish to and install from your repository: see Publishing a PyPI Package and Installing a PyPI Package, or the tutorials for twine and pip.

