

 Edit This Page
Creating Your First Repository
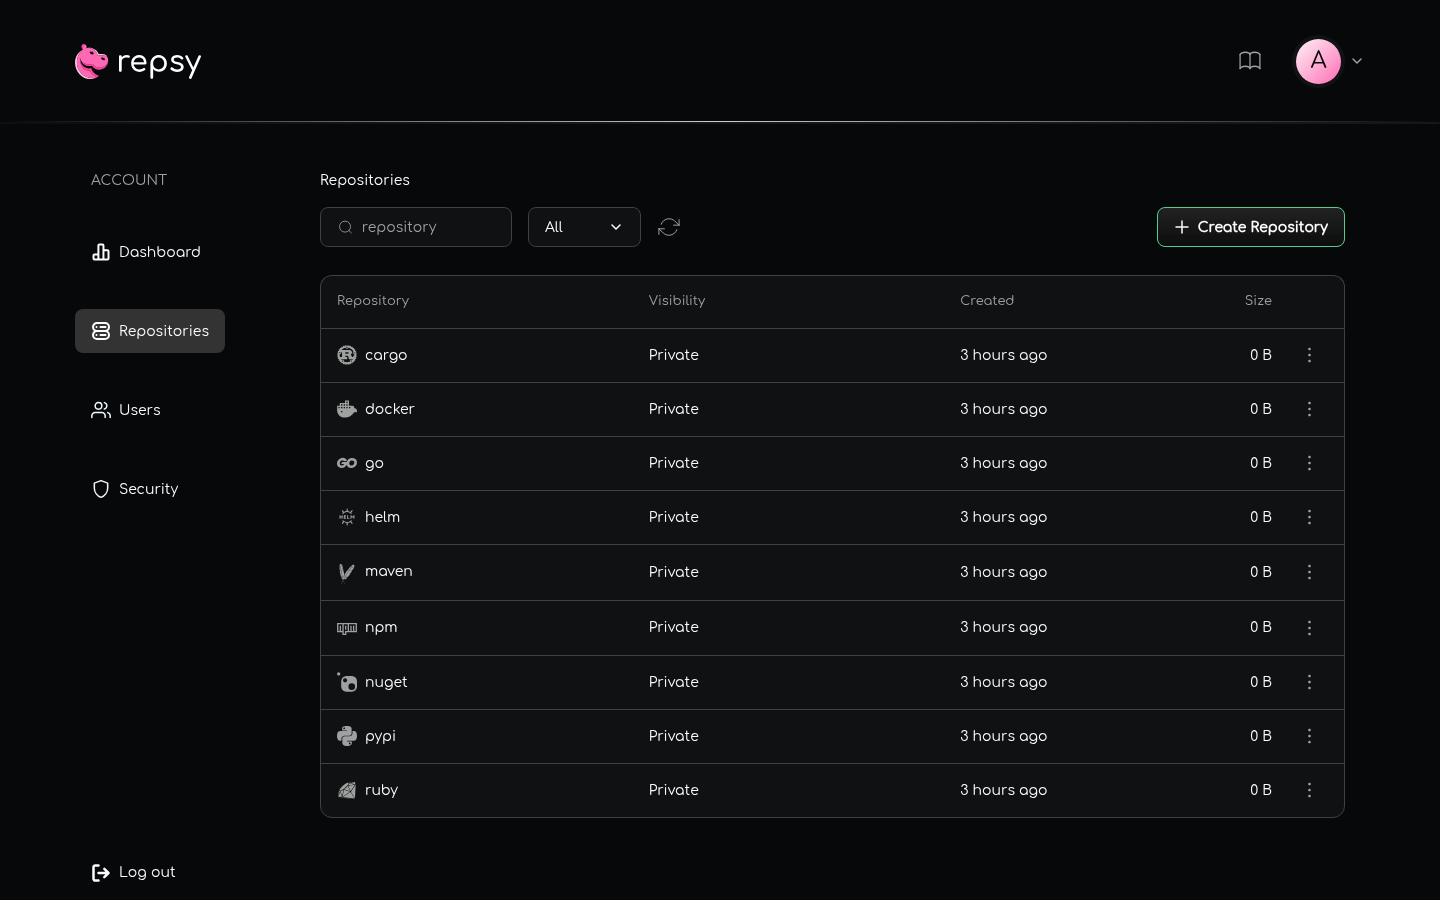
Repsy Open Source needs no sign-up and has no plans to choose from. When it starts for the first time and creates the
first administrator account, it also creates one private repository for each package format, named after the format:
maven, npm, pypi, docker, cargo, go, helm, nuget and ruby. You can use them right away, or create new
ones based on your workflow.
Creating a repository needs the ADMIN role. Users with the USER role can use the repositories but not create them.
After you sign in, you arrive on the dashboard. Here you can:
- See the total disk usage and the number of repositories
- See how many repositories of each package format exist
- Check recent activity: the newest repositories
- Quickly create a new repository using the button at the top
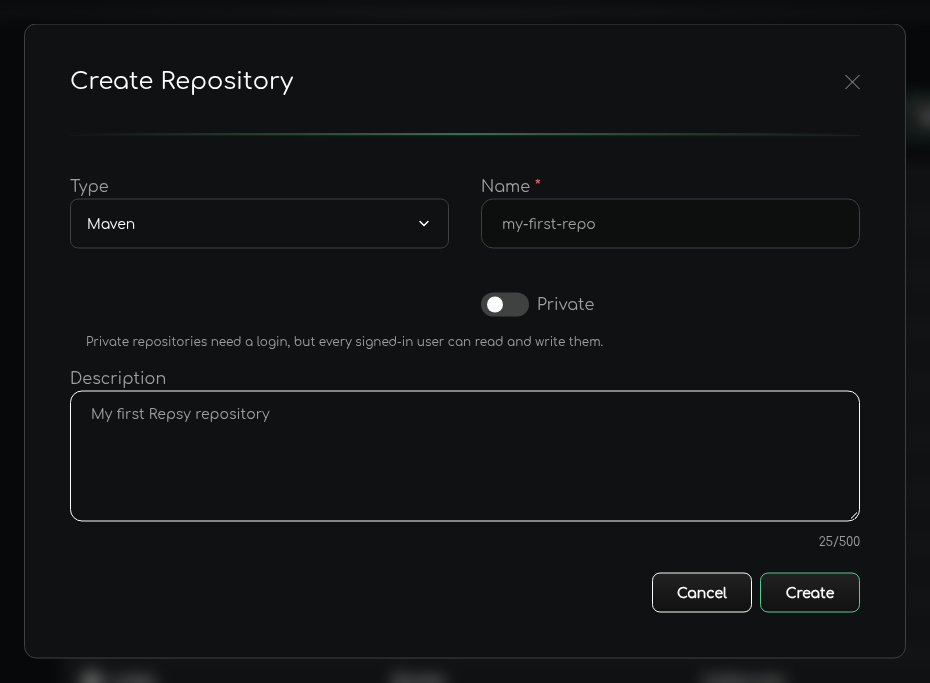
Open the Create Repository dialog
On the dashboard, click Create Repository at the top. You can also do it later on the Repositories page in the sidebar, which has the same button.
Fill in the repository details
In the dialog, set:
| Field | Details |
|---|---|
| Type | The package format of the repository. The dialog starts on Docker, or on the format the repository list is filtered to. |
| Name | Required, 25 characters at most. Letters, digits, - and _, and it cannot start with -. It must not be a reserved name, and it must not be used by another repository of any format. |
| Visibility | A switch labelled Private. It is off by default, so the repository is private. Switch it on to make the repository public: its label then reads Public. |
| Description | Optional, up to 500 characters. |
The name becomes part of the address of the repository, <repo-base-url>/<repo-name>, and of the address of its page in
the web UI. See Ports and Repository URLs.
These names are reserved, in any letter case, because the web UI or the API already uses them: login, profile,
repositories, users, security, not-found, api, assets, favicon.ico, counts and security-summary.
Repsy answers “This name is reserved for the panel. Please try another name.” when you try one. If the name is taken
by another repository, it answers “The repository exists. Please try another name.”
Private means that a sign-in or a deploy token is needed to read the repository, and every signed-in user can read and write it. See Understanding Public vs Private.
Click Create to continue.
View and access your repository
After creating the repository, you are taken to the Repositories page and a message confirms it. The list shows the newest repository first, with its format, visibility, creation date and size.
From here you can:
- Click the repository to open it and use Configure to see the client configuration for it
- Search the list, or filter it by package format
- Use the menu (⋮) on the row to open Settings or Delete the repository
- Create another repository at any time with Create Repository
Defaults of a New Repository
A new repository is private. It accepts uploading a version that already exists again, except for Cargo and Go, which never overwrite a version. A Maven repository accepts both snapshots and releases. You change these settings later, as an administrator, in the repository settings. See Configuring Repository Settings and Navigating the Web UI.
Next Steps
- Create a deploy token so that a CI job can use the repository without a user account.
- Read Ports and Repository URLs to see how your build tools address the repository.
- Follow the tutorial of your package format to publish the first package: Docker, Maven, npm, PyPI, Helm or Cargo.

